

Pre-Wiring for Motorized Shades: The South Florida Guide
July 18, 2026 · Updated August 30, 2026 · Automation · By David Martineau
The cheapest moment to wire a shade is before the drywall goes up. The most expensive is after the painters leave. If you are building or renovating in South Florida, this guide covers what to run, where to run it, and the one meeting that saves the whole project.
Why pre-wire at all, when battery exists?
Battery motors are excellent, and we install them every week. But wired shades never ask for anything: no recharging, no battery replacement, decade after decade. On a whole home, that maintenance difference compounds. Wired motors are also the quietest available and handle the largest, heaviest treatments. If the walls are open anyway, wiring costs a fraction of what it delivers.
The rules that never change
Brands differ in cable and voltage, but four rules hold for every wired shade we install, on every system:
- The wire lands at the head of the window, on the motor side. We specify left or right per shade, because the motor end follows the fabric roll direction. Terminate inside the shade pocket or just above the header, not at an outlet height.
- Leave a 3 ft service loop. A coiled meter of slack costs nothing at rough-in and saves the installation when a pocket dimension shifts or a motor is swapped years later.
- Every run is a home run. Each window goes back to one central location, usually an equipment closet or mechanical room. No splicing shade wiring window-to-window inside the walls.
- Low voltage still deserves respect. 24V shade wiring is NEC Class 2, but it must be rated cable (CL2 or better, plenum-rated where required), separated from line voltage, and documented. We issue a window-by-window schedule so nothing is guessed on site.
Lutron: Sivoia QS, 24V on the QS link
Wired Lutron Sivoia QS drives run on 24V DC and communicate over the same cable that powers them: a 4-conductor QS link, one pair for power and one pair for data, home-run or looped to a Sivoia QS smart panel in the equipment closet. Cable gauge is set by run length: 18 AWG reaches about 125 ft, 16 AWG about 200 ft, and 12 AWG up to 500 ft per Lutron's cabling charts, using Lutron's own QS cable or listed CL2/CL2P equivalent. One panel powers many shades, so a whole floor often needs nothing at the windows but those slim stubs.
Two variations worth knowing. Palladiom PoE shades take a single network cable per shade back to a PoE switch, which turns shade power into standard structured wiring. And Lutron's wireless line (Sivoia QS Wireless, Triathlon) is the graceful fallback where wiring never happened; our Lutron systems comparison covers which tier fits which project.
Somfy: two roads - 120V RTS or 24V DC and SDN
Somfy splits its wired range in two. The line-voltage family (Sonesse 50 RTS and kin) wants a 120V AC recessed junction box at the header, wired by the electrician like any other branch circuit. The low-voltage family, Sonesse 30 and Sonesse Ultra 50 at 24V DC, follows the same logic as Lutron: small-gauge home runs to central transformers or DIN-rail supplies. Somfy's databook puts the power runs at roughly 100 ft on 18 AWG, 150 ft on 16 AWG, and 240 ft on 14 AWG.
On larger projects we specify SDN, Somfy's wired RS-485 bus: every motor addressable, every position confirmed. SDN adds a shielded, twisted 22 AWG data set alongside the power conductors, and Somfy sells a single combined SDN motor cable, plenum or non-plenum, that carries both. If a project may ever grow into SDN, pull that cable on day one; the cost difference is trivial against opening walls later.
Crestron: 24V Cresnet, one home run per motor
Crestron's QMT shade motors run on 24V DC, NEC Class 2, over Cresnet: a 4-conductor cable carrying power and bidirectional communication together. The rule that surprises electricians is that every QMT motor is home-run to its power supply - never daisy-chained. Standard Cresnet is good for about 130 ft; Cresnet HP stretches to 500 ft. Supplies scale from a single-motor unit (CSA-PWS40) to a ten-motor hub (CSA-PWS10S-HUB-ENET), so a Crestron closet is sized by motor count. We are Crestron certified and program these systems in-house, most recently on a Sunny Isles high-rise running shades and track through Control4 and Crestron hardware.
The cheat sheet
| System | Motor power | Cable to each window | Typical max run | Prewire note |
|---|---|---|---|---|
| Lutron Sivoia QS | 24V DC | QS link: 4-conductor (power pair + data pair), CL2/CL2P | 125 ft @ 18 AWG · 200 ft @ 16 · 500 ft @ 12 | Runs land at a Sivoia QS smart panel |
| Lutron Palladiom PoE | PoE | One network cable (Cat 5e/6) | Standard Ethernet distance | Terminates at a PoE switch, not a shade panel |
| Somfy 24V DC (Sonesse 30 / Ultra 50) | 24V DC | 2-conductor power; add shielded 22 AWG twisted data set for SDN (combined SDN cable available) | 100 ft @ 18 AWG · 150 ft @ 16 · 240 ft @ 14 | Central transformer or DIN-rail supply |
| Somfy line voltage (RTS) | 120V AC | Standard branch circuit | Per electrician | Recessed J-box at the header, motor end |
| Crestron QMT | 24V DC (Class 2) | Cresnet 4-conductor (power + data) | 130 ft standard · 500 ft Cresnet HP | One home run per motor - no daisy-chain |
Run lengths are from current manufacturer cabling charts and assume one motor per output; the binding numbers for your project come from the window-by-window schedule we issue with the shade order.
The home-run backbone
Every system above converges on the same picture: thin cables fanning out from one closet. That closet needs four things - space for the power panel or supplies, a duplex outlet, a network drop for the control processor, and a little ventilation. Put it on the plan early; it is much harder to invent after the millwork is drawn.
Control system undecided? Wire for all of them
Plenty of projects rough-in before the automation brand is chosen. Two moves keep every option open. Where walls and ceilings are framed, pull one shielded Cat 6 plus one 16-2 low-voltage cable to each shade location - between them they satisfy or adapt to every system in the table above. Where the structure is concrete, run 3/4 in conduit to each window head instead, and the cable question can wait until the brand is settled.
South Florida: concrete changes the plan
Most of our projects are CBS homes or poured-concrete condo towers, and concrete does not forgive afterthoughts. There is no fishing a cable through a poured deck: pathways to each window head either go into the formwork as conduit before the pour, or they ride in furred ceilings and soffits designed at plan stage. In new condo construction this is exactly when the shade pocket is decided too, so the two conversations belong in the same meeting. In an existing concrete condo, be honest about the constraint: surface raceways are ugly, so renovations that cannot open ceilings usually land on battery motors or a furred-down pocket detail that hides both shade and wiring - we build both options weekly.
Two smaller South Florida notes. Impact-glass window bucks are deep, which is good news: they leave generous room for pockets and side channels. And salt air is real - keep terminations inside conditioned space, not in exterior soffits.
Do not forget the pocket
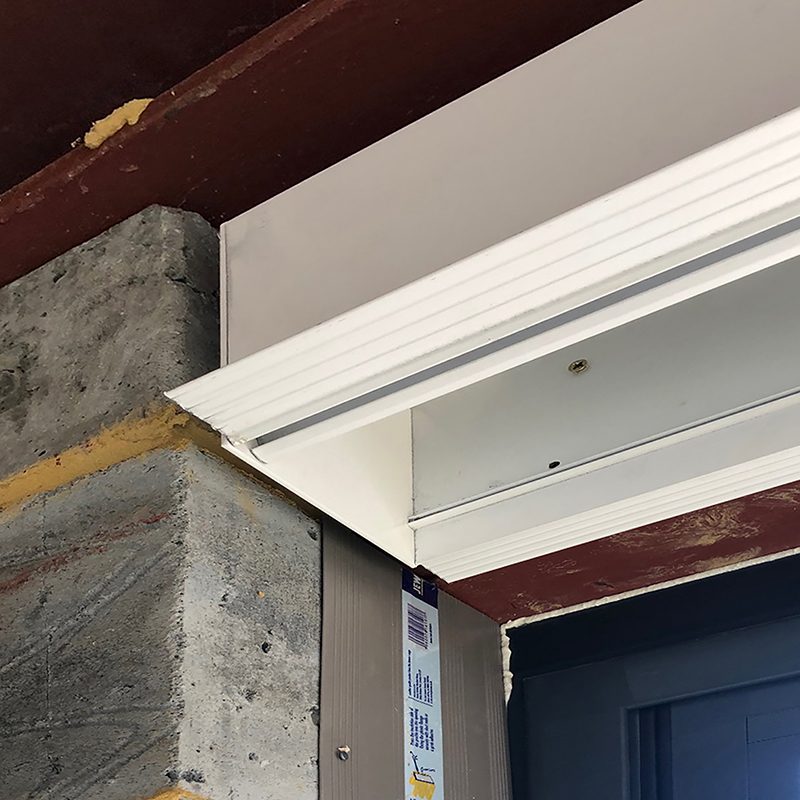
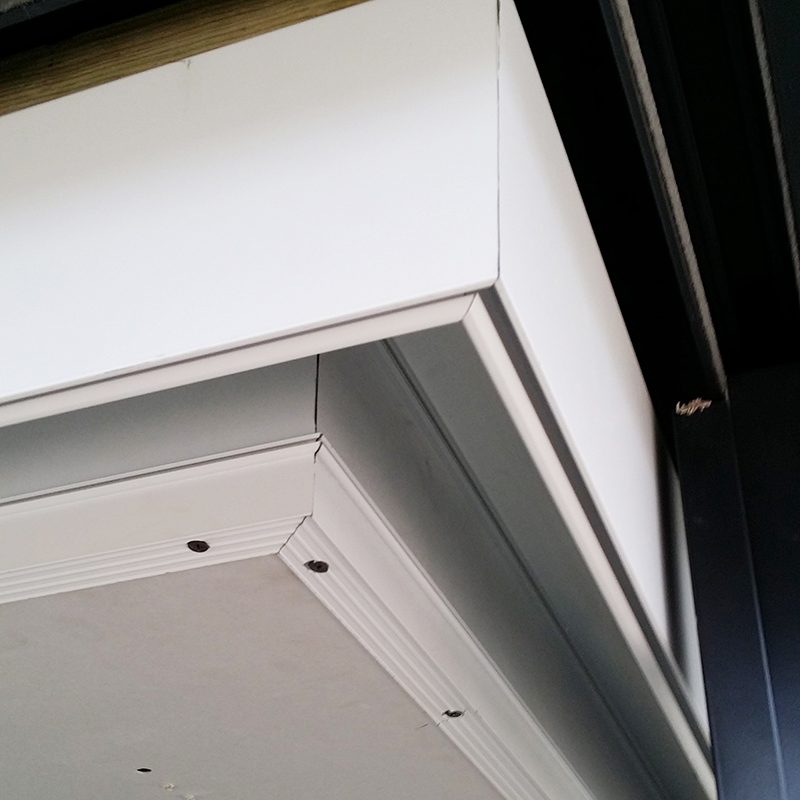
Wiring is half the pre-construction story. The other half is the shade pocket: a recessed ceiling detail that swallows the roller completely, so all you ever see is fabric. Pockets cost almost nothing in framing when planned early and cannot be added gracefully later. If you want drapery too, the same logic applies to recessed track channels. Plan both at the same meeting, and land the wire inside the pocket as the diagram above shows.
Where 120V earns its place
Oversized spans, heavy blackout systems, and exterior screens want line-voltage torque. For those openings, the electrician brings a 120V junction box to the pocket or header - same location as the low-voltage stub, different trade on the plan. The rule of thumb we use: standard interior windows go low-voltage; the giants and the outdoor units go 120V. Your shade plan should mark each opening before rough-in, which is exactly what our plan-stage walkthrough produces.
The one meeting that saves the project
Bring your shade company in when the electrical plan is drawn, not when the punch list starts. In one session with your GC, electrician, and integrator we mark every opening: motor type, power type, wire termination side, pocket dimensions, and control system. Thirty minutes of coordination at the plan stage routinely saves thousands in change orders, and it is a service we provide as part of every construction project, from single residences to full developments.
Not sure yet whether wired or battery suits your project? Start with our plain-language guide: Battery vs. 24V vs. 120V.
Building or renovating?
Send us your plans. We will return a window-by-window motorization schedule your electrician can build from.